


This weekend it's party time over at Inspiration Avenue. The ladies and I are hosting a tutorial party. You are of course all invited. Come on over and learn a few hot tips....
I so wanted something dainty and delicious to wrap up in a pretty serviette for you to take away and savour later but my mind is not exactly in party mood this week.

I've been wracking my brain for weeks trying to think up with the perfect tutorial for the party . Coming up with the invitation was a piece of party cake, but the content of my party bag something else entirely!
I so wanted something dainty and delicious to wrap up in a pretty serviette for you to take away and savour later but my mind is not exactly in party mood this week.
I hate to moan, but I have the most awful pain in more jaw - some form of inflammation in the joint apparently and I feel quite wretched. It throbs, it hurts in ear, cheek and general head area... My Muse decided to stay on the beach in Mexico.
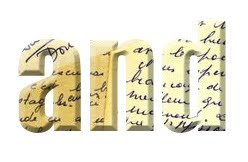
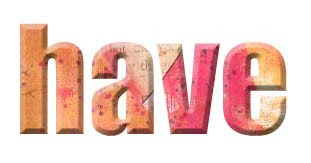
So, what I have for you is quite small and simple, but nonetheless it's quite useful to know how to do this if you are a Photoshop Elements user.
I will now demonstrate how to put picture behind your text using this software (see sample above).
Step 1. Create some text.
Step 2. Open up the picture you want to use.
Step 2. Open up the picture you want to use.
Step 3. Drag the picture over your text.
Step 4. Click on Layer>Group with previous - and sit back amazed as the magic happens
Step 5. You can drag the image (now behind the text) around until you get it just right. For me, it was when the Mad Hatter made an appearance in my party P. Et voila! I then filled the background black and gave it a nice bevel edge.
Step 6. Sit back and admire your handiwork!
Before I go and explore the other party tutorials, this is one which I'd like to share:
One of the most useful tips I learnt for blogger was how to remove the box around my title. You can find this and a myriad other handy hints by wandering down Inspiration Avenue, until just past the Jacaranda tree you'll find Plumrose Lane on your right.
Have fun at the party, play nicely and don't drink too much fizzy pop!


Wow, lots of good tips here. Thanks Lisa! And I hope you feel better soon.
ReplyDeleteWonderful tips Lisa. Thank you for taking the time when you don't feel so good. Hope you feel better quickly.
ReplyDeleteI'm so sorry that you're not feeling good ... jaw pain can cause your whole body to feel rotten. I hope you're well soon!
ReplyDeleteLove your "lessons" ... wonderful tips! And so far ... I haven't seen one other "goodie bag" like it!
Thanks so much and ... feel better soon!
Ooh, that's miserable to have pain in your jaw ~ it travels all around until you don't know where it hurts most.
ReplyDeleteThis is a really cool photoshop tip! Thanks for sharing! Hope you're better soon!
This looks great - very clever trick! Thanks for sharing your wisdom Lisa (and hope you feel better soon!) :)
ReplyDeleteThanks...I am not so hot at this sort of thing but you explained it well so maybe I can do it!
ReplyDeleteSuz
http://katsuijewelry.blogspot.com
P.S. My daughter and I are relatively new bloggers...come by if you would like. It really is not all about jewelry! We like too many arts and crafts!
Thanks for the awesome tips! I hope you feel better very soon! Could you add me to the party participants? I am all dressed up with no visitors~* ha! I am enjoying the party favors and taking home a lot of great tips and ideas!
ReplyDeleteCheers!
www.ImGirl.blogspot.com
Poor Lisa...I know that pain too well, it's miserable.
ReplyDeleteThank you for the tips, sounds easy enough, but we shall see...I'll let you know when I play with it :)
xox and feel better soon!
You know something funny... I didn't even know this trick at least not exactly. I've always just held down CTRL, ALT, and then pressed G. So see there... you've taught me something about graphics. ;-)
ReplyDeleteI sure hope you feel better soon and take care of you~ Hugs♥
Hi there,
ReplyDeletethanks for the lovely positive words about my art e-course, really glad you are enjoying it. As I have just launched the dates for the Summer course, if you know anyone who might be interested send them over, or if you want to put a shout out, please do!
Oh yeah, and I am always up for a party - any kind of party!!
Thanks for the hot tips, will check them out!
Amelia.x
What a great tutorial- I am still a newbie with altering images on the 'puter and any suggestions, guides or imformation are all greatly appreciated!
ReplyDeleteSee you at the party!
Stephanie
I truly LOVE this tip. It may be small, but it is very powerful. Thanks for sharing it during the Inspiration Avenue Blog Party. And I never thought about the box around my banner before. For some reason, I just thought it was part of the design I created. Thanks for the heads up.
ReplyDeleteSo sorry you are feeling under the weather... Lots of rest and drink water. Hope you feel better soon.
ReplyDeleteGreat tip! It was so easy to follow the instructions.
Sorry about your jaw pain and what a fabulous tutorial. I'm going to store it away for the moment when I finally buy Elements!!
ReplyDeleteDon't eat too many lollipops while you're playing ;-)
A
xx
Great tip Lisa! I will most definitely try this since i love to play around in photoshop. It should work in elements right????
ReplyDeleteHope your feeling better.
hugs,
Charlie
Always inpsiring..wonderful! I hope you feel better and all shiny sparkly real soon!
ReplyDeleteKiki~